Locations and rooms: how to conveniently manage multiple cameras?
We made working with a large number of devices in the Faceter app easy and convenient: each camera can be assigned to a separate location (e.g. office, store, warehouse, apartment) and added to its own room (e.g. open space, checkout, living room).
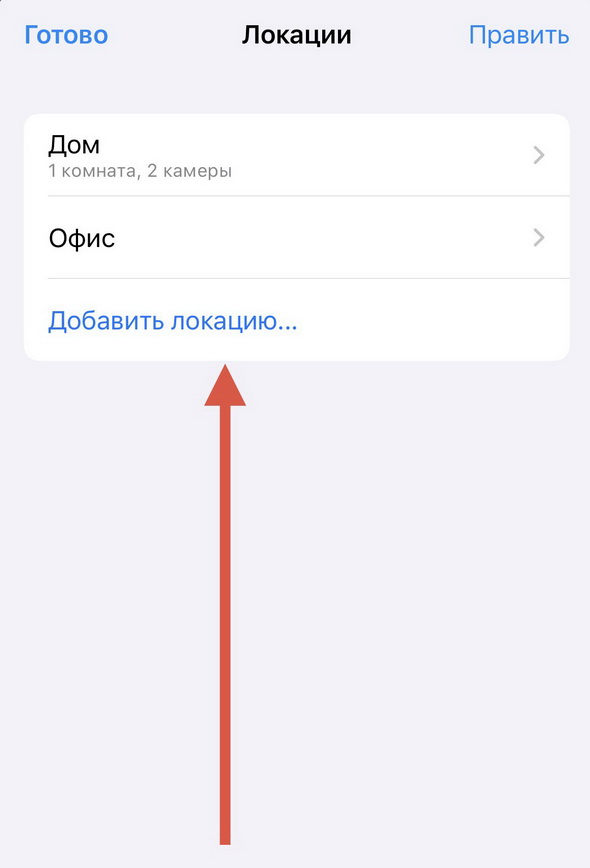
Creating a Location
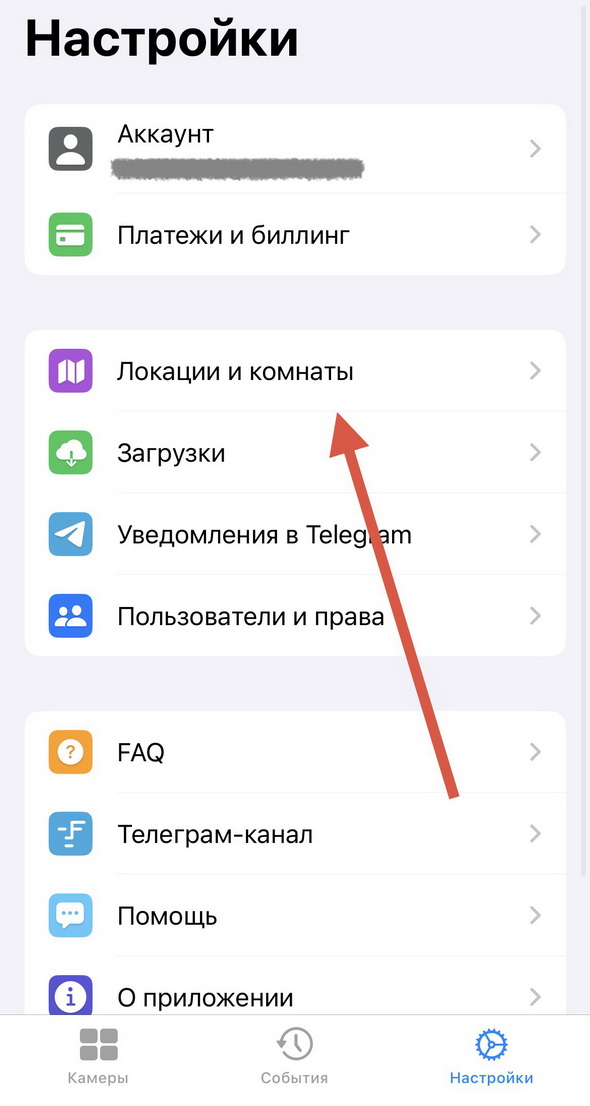
Section titled “Creating a Location”- Go to Settings
- Select “Locations and Rooms”
- Tap “Add Location”
- Enter the location name and tap “Continue”

- If needed, add a room to the location
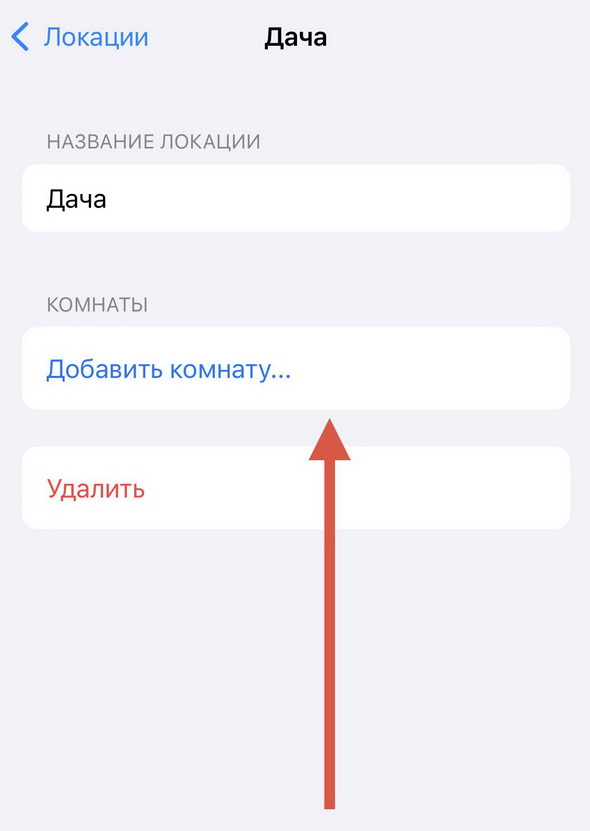
- Enter the room name and tap “Continue”.

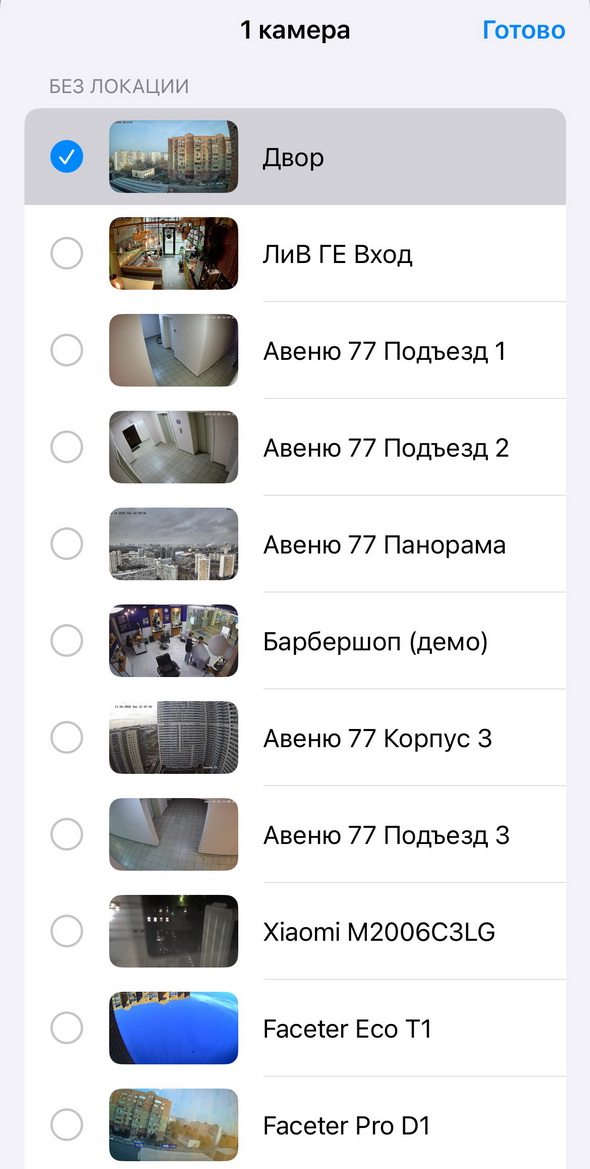
- Tap “Add Camera”

- Select the required camera(s) from the list and tap “Done”.
The same steps can be performed during the process of adding a new camera to the Faceter app.
Managing Locations
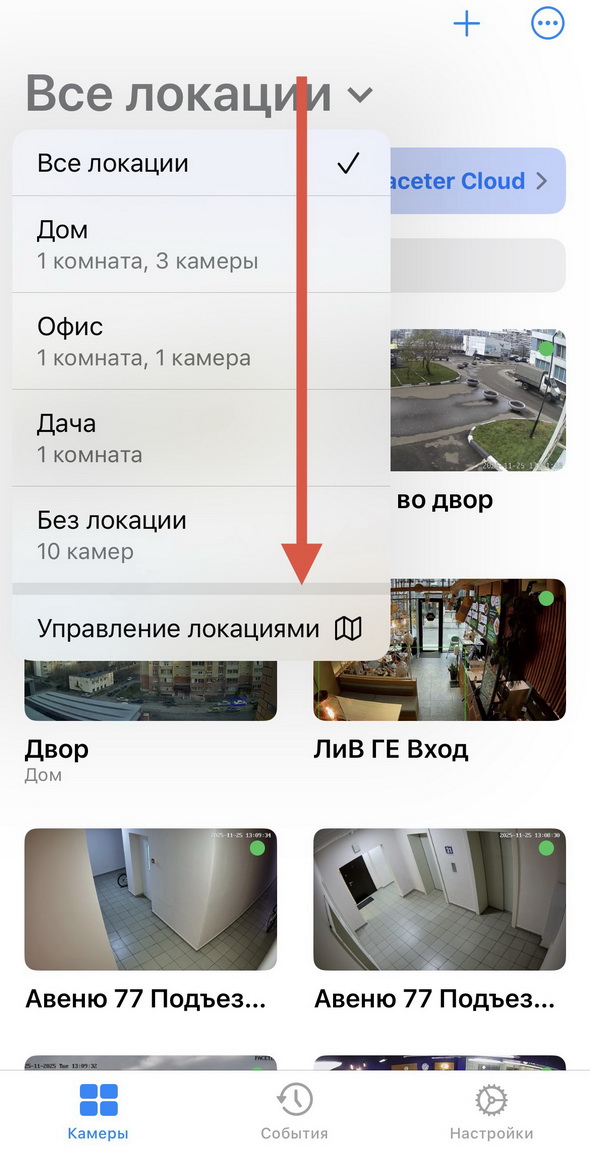
Section titled “Managing Locations”Managing existing locations is done in the “All Locations” section, via the “Manage Locations” button.
Changing Assignment
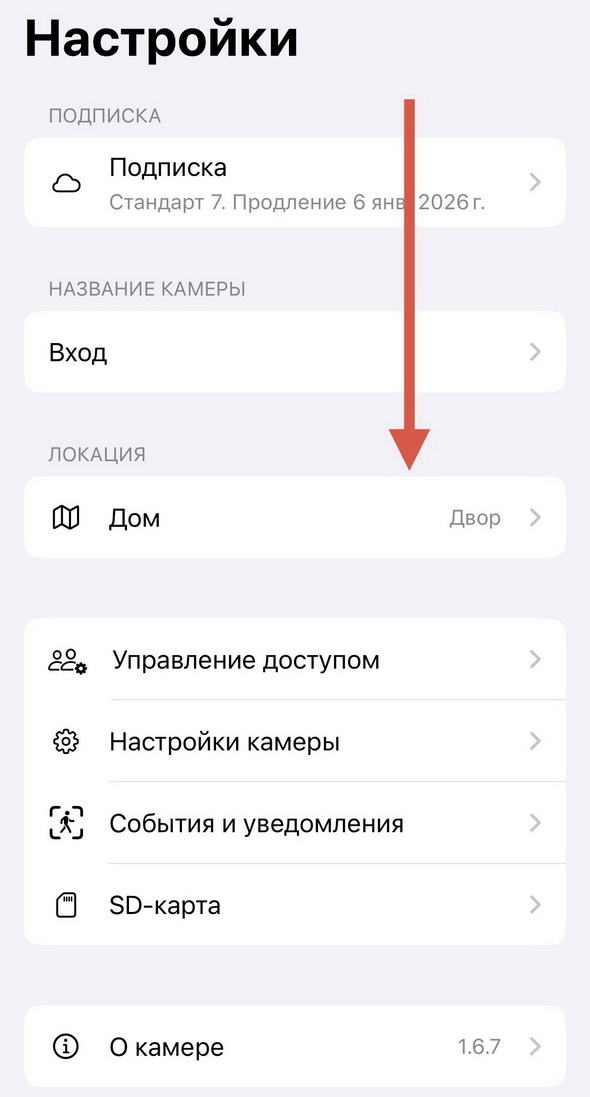
Section titled “Changing Assignment”An already added camera can be moved to a different room/location. To do this, go to the camera settings, tap “Location”, and select the desired option.
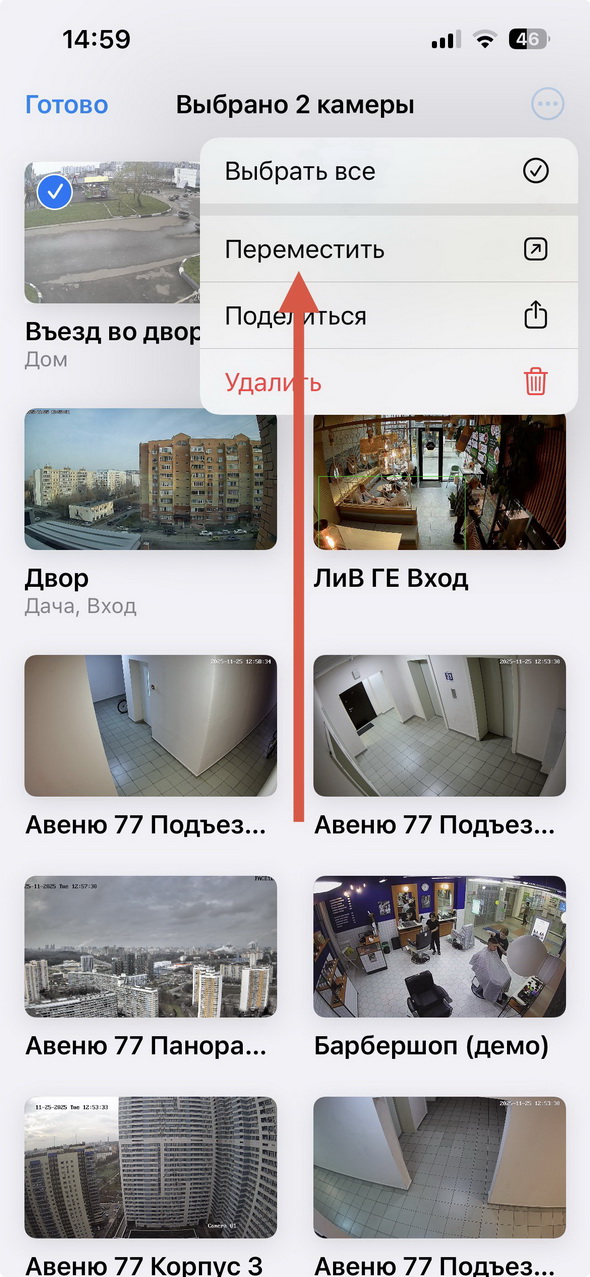
To move multiple cameras at once, select the required devices, go to settings, and choose “Move”.
Working with Cameras
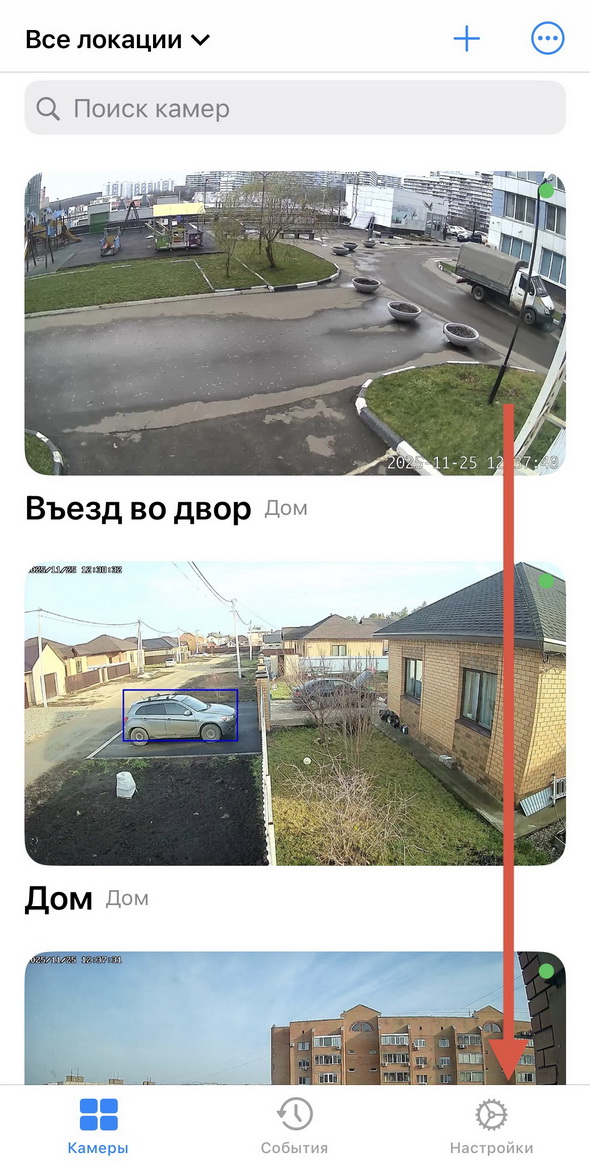
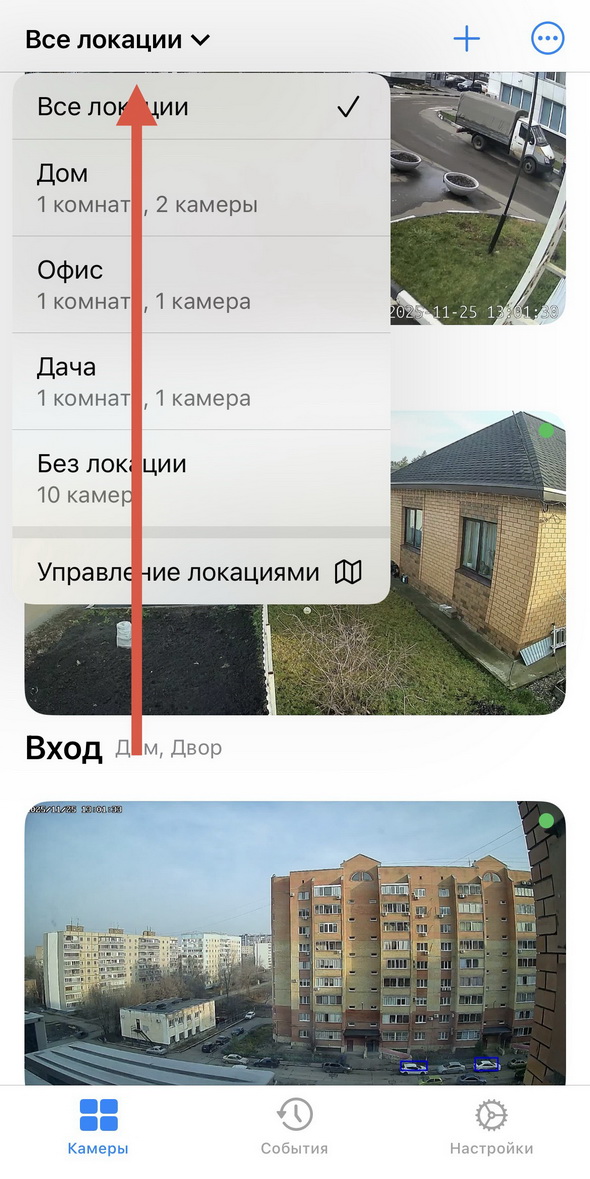
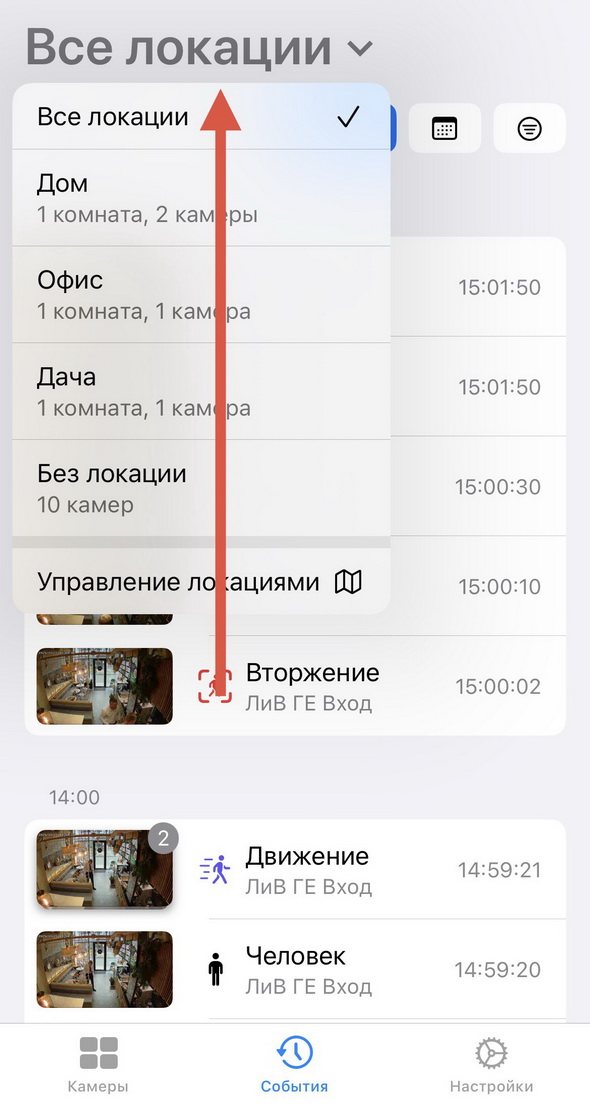
Section titled “Working with Cameras”In the full camera list you can display only the devices from a particular location. To do this, tap “All Locations” and select the location you are interested in.
Event Search
Section titled “Event Search”Event filters (Motion, Person, Vehicle, Line Crossing, and Intrusion) are available both for an individual camera and for an entire location.
How to find events for cameras in a specific location:
- Tap the “Events” icon
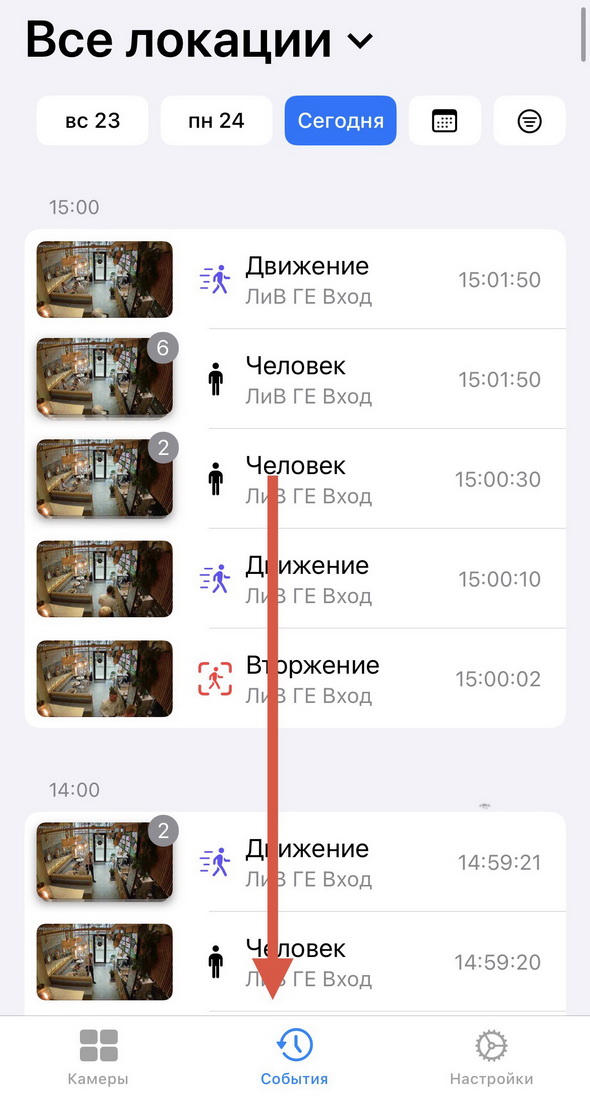
- Tap “All Locations” and select the location you are interested in
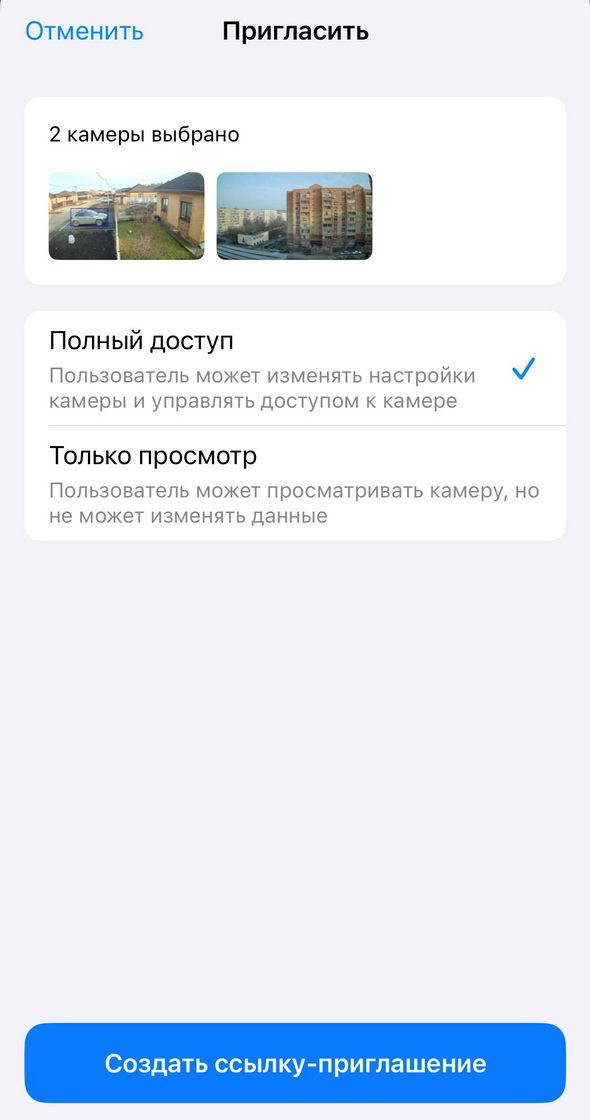
Sharing Access
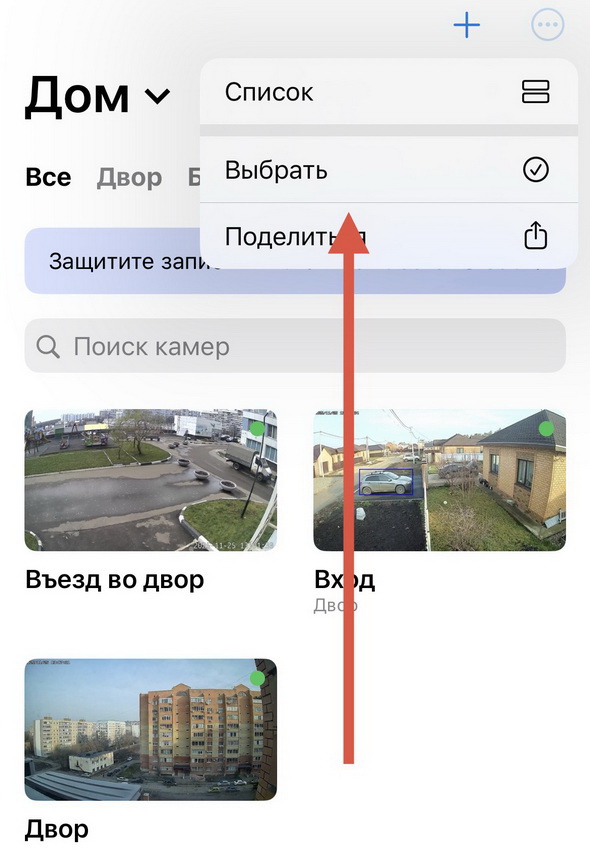
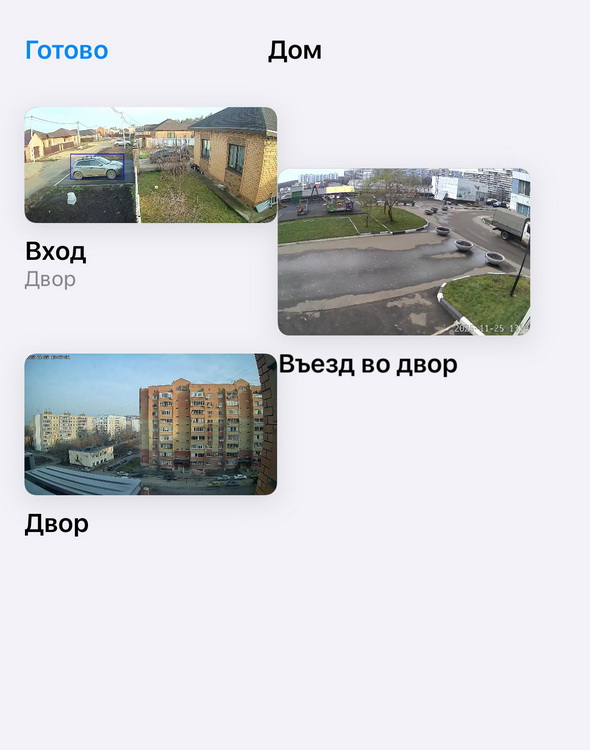
Section titled “Sharing Access”- Select the cameras you are interested in
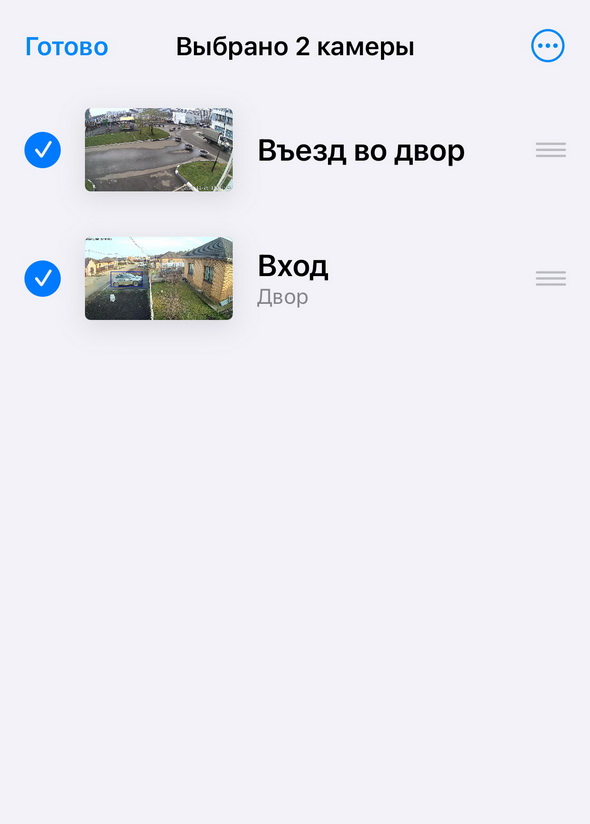
- Tap the three dots in the upper right corner and select “Share”
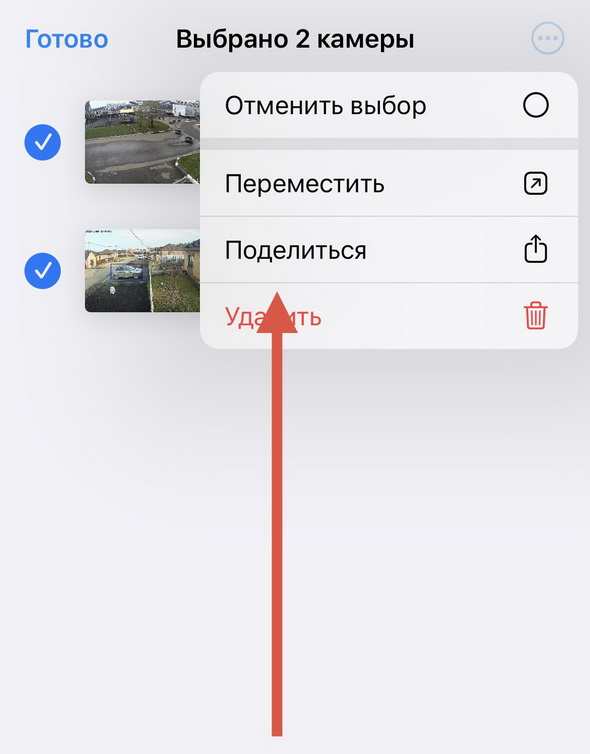
- Set the access parameters.
Sorting Cameras
Section titled “Sorting Cameras”To change the order of cameras within a room, select the camera(s) you want and drag them to a new position.